Guide to Snow-Dyeing with Yarn
Disclaimer: I am not a professional dyer, I am a hobbyist who loves experimenting. I thought it would be fun to share the steps I took, mistakes I made and the outcomes so you could do your own exploration!
For this project, I took the knowledge I know about more traditional methods of dyeing yarn and combined them with the unpredictability of using snow. I was inspired by fellow knitters such as Caitlin (@murphs_knits) who were experimenting with this method.
THE YARN
This is dependent on the type of dye you are planning to use. For my project, I used acid dyes so I used animal (protein) fibers such as merino, alpaca, wool, and mohair. Unlike manmade fibers, animal fibers are porous and allow for yarn to be absorbed.
Another option would be to experiment with blends that incorporate animal and manmade fibers - like merino/acrylic sock yarn. The amount of animal fiber present in the yarn will determine how the dye is absorbed. In my personal experience, the higher the manmade fiber percentage is in a fiber, the more blended (like watercolors) and muted the tones are in the final product.
The specific yarns I used are listed below with links.
THE DYE
I used acid dyes which is what most indie-dyers used. It produces vibrant colors and since it is made for dyeing, it is predictable in how it will interact with your fiber.
You can also food coloring which is much easier to find and likely around the house.
THE DYE BATH
This is basically any kind of large container that holds your yarn while it’s being dyed.
For this project, I used a full size hotel steaming pan that was 4” deep. In the past, I’ve used stainless steel pots that I found in thrift stores or a crockpot.
OTHER MATERIALS
Dishwashing gloves
Mask
Distilled white vinegar or citric acid (mordant)
Spoons
Optional: tongs, big mixing spoon, measuring cup
Please note, the materials you use for dyeing should be dedicated to dyeing only. They should NOT be used for food or food preparation.
The step-by-step process of dyeing with snow

SOAK THE YARN
In the full-size hotel pan, I am able to fit 3 to 4 skeins of 100g yarn comfortably. You want to ensure there is room for movement to allow dye to get to the undersides of the skeins.
I soaked the skeins initially in 8 cups of water with a generous amount of citric acid. With my first run, I realized I did not add enough water so it may be better to up the amount of 12 cups of water.
I soaked the yarn for 30 minutes before adding the snow and dye.

ADD SNOW
I added enough snow so it was about 1” / 2.5cm from the top of the pan. As the snow melts, it takes up less room in the pan so you can easily add snow all the way to the top. For my own set-up, the lid of the hotel pan comes down a little bit so I left clearance to allow for that.

ADD DYE
I sprinkled the acid dyes on top of the snow.
As the snow melts, the dye will spread out so don’t add too much. You can always add more later if you noticed it is not as dark as you would like, but you cannot take it out if there’s too much.

LET SNOW MELT
This part is really fun. You get to watch as the colors spread and blend into each other.

ADD HEAT
I put my hotel pan across two burners and heated it at a low temperature for about 20-30 minutes.
Be sure there’s enough water so your yarn can move a little and isn’t cooking. With my first trial, I had to add more water at this step.
You can also heat the yarn in the oven by setting your temperature to 170-200 degrees and heating for 20-30 minutes.

RINSE THE YARN
Once the dye is saturated and the water is clear, you can rinse the yarn.
It is best to allow the yarn to cool down to room temperature so you don’t shock your yarn, but if the yarn is superwash or not likely to felt, you can rinse right away too.
HANG TO DRY
Hang it to dry, ensuring there’s good air circulation and the yarn isn’t too squished together.
Now you have beautiful snow-dyed yarn!
My Personal Results
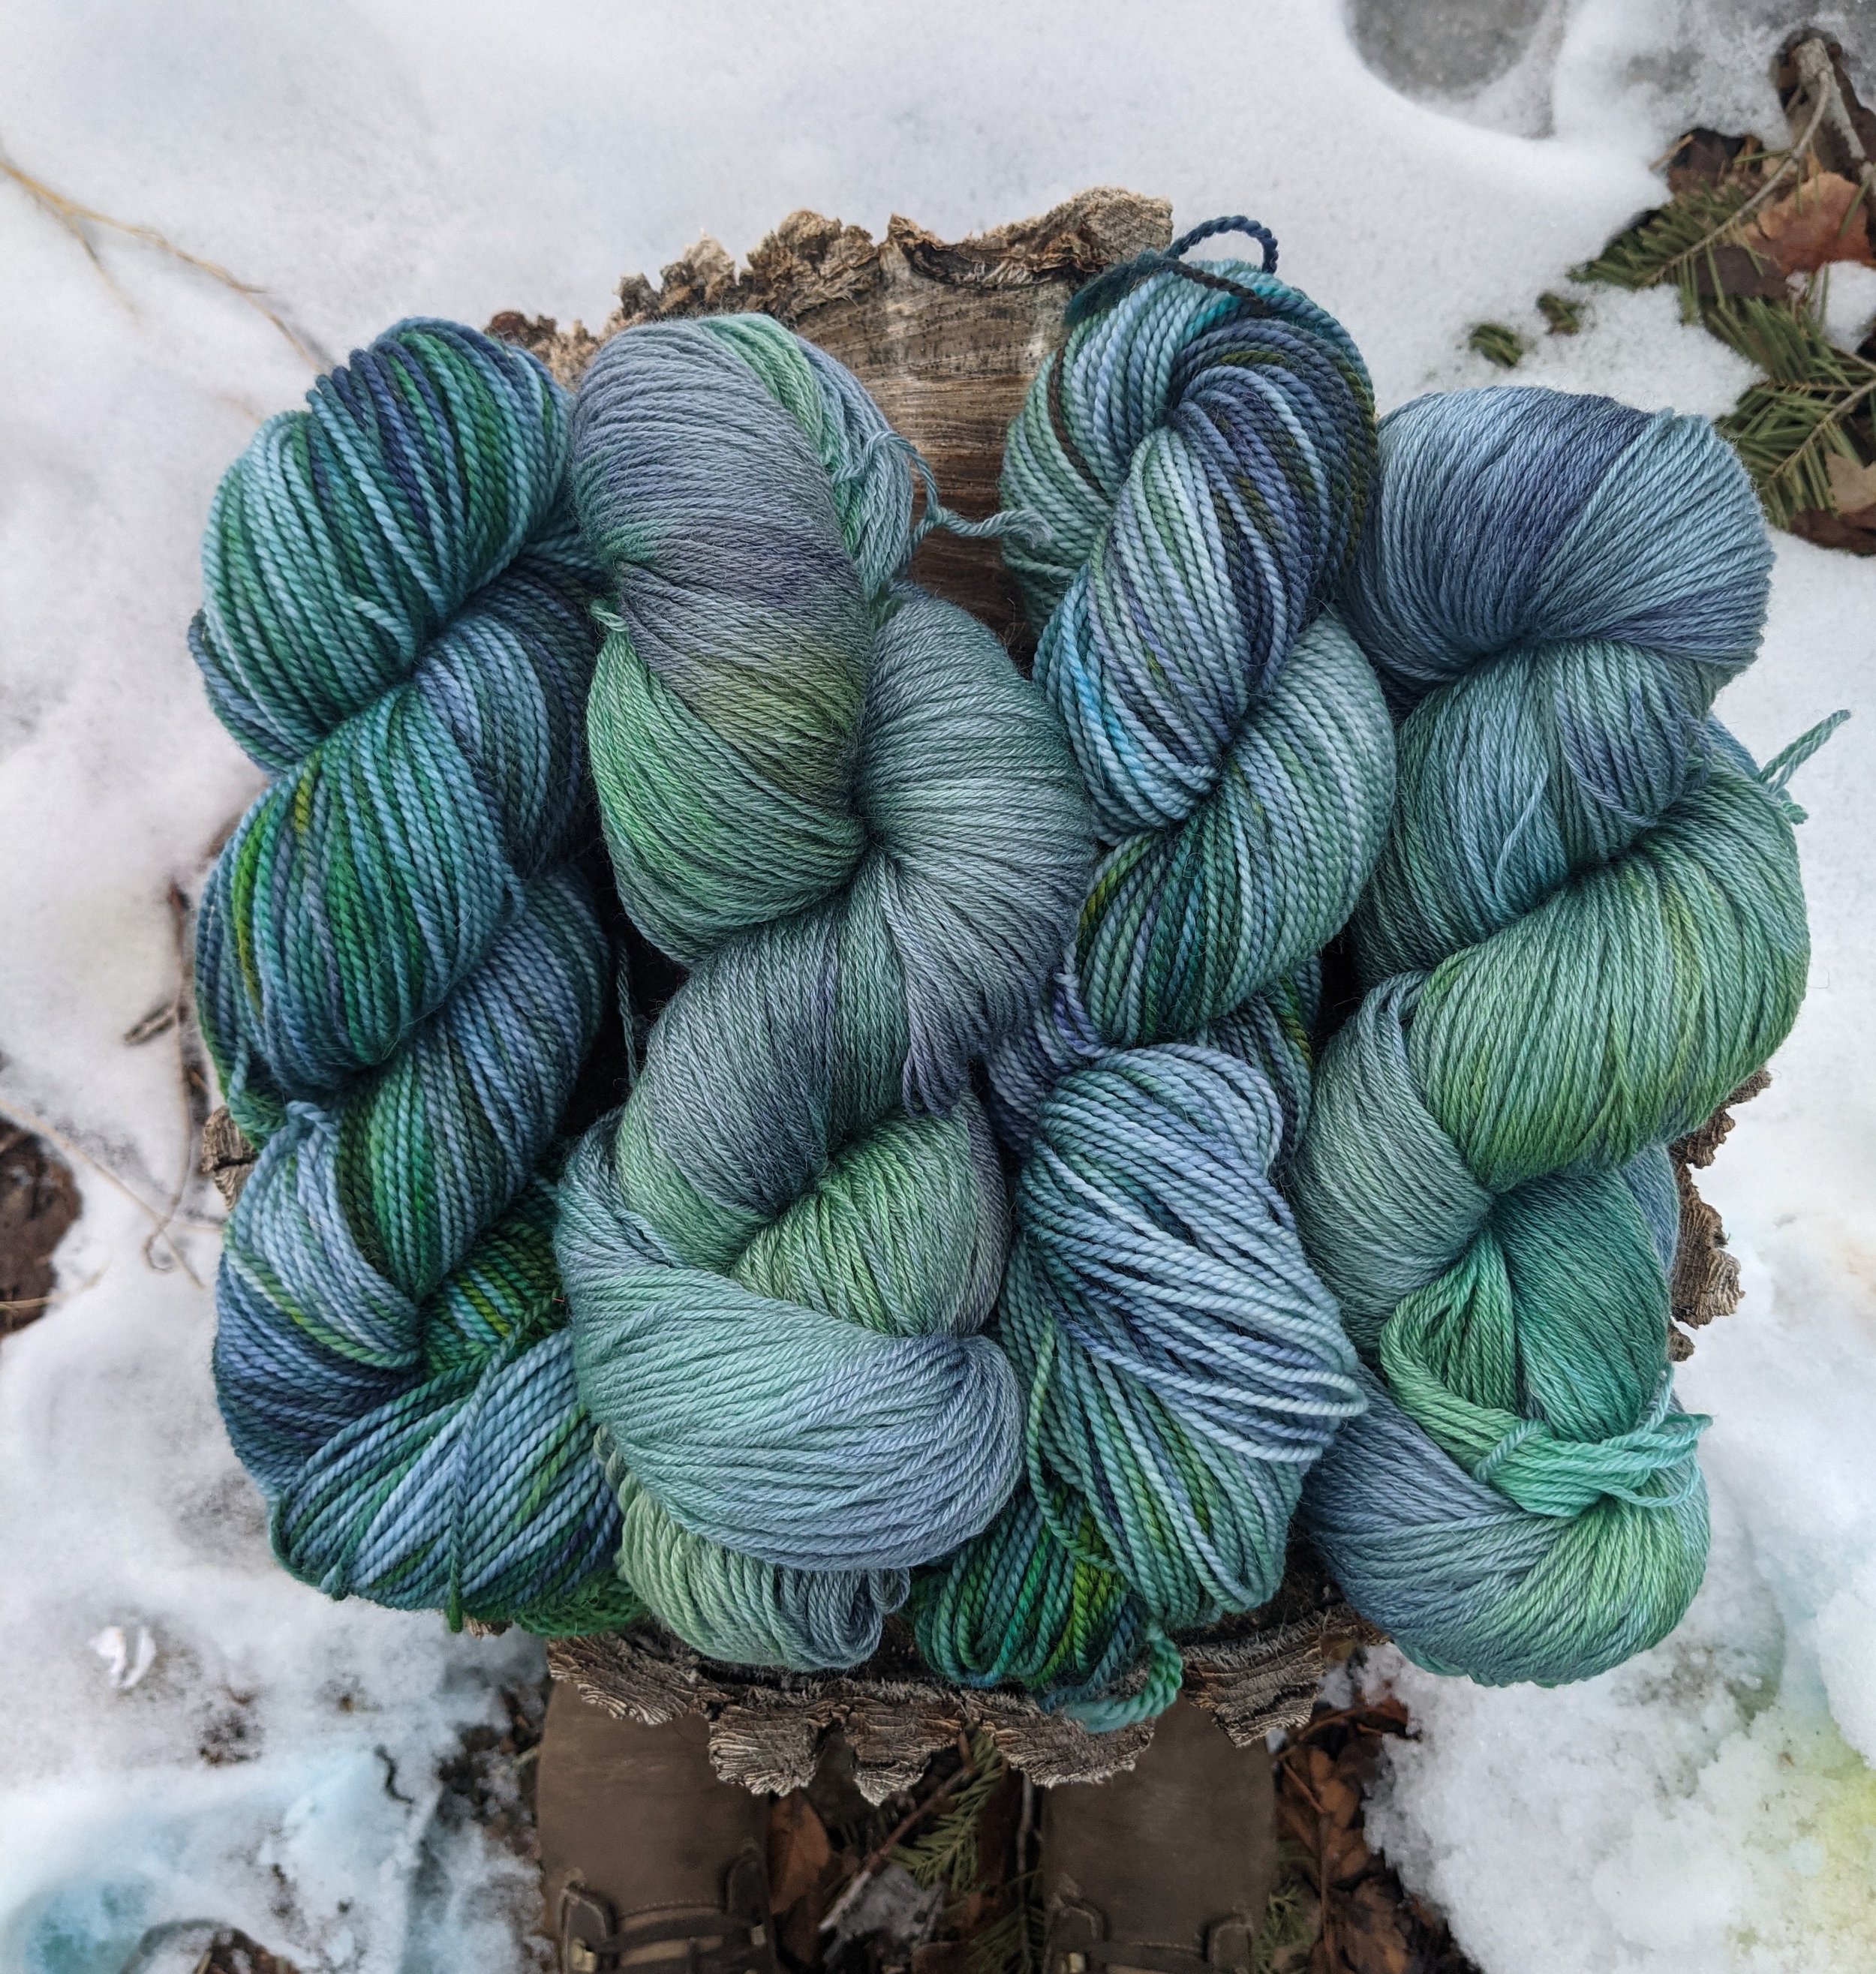
FIRST TRIAL
For my first round of snow-dyeing, I used 2 skeins of Knomad Yarns Steam which is a SW Merino and Baby Alpaca Blend and 2 skeins of Knomad Yarns Asperitas which is a recycled wool/tencel blend.
I knew from previous dyeing projects that the colors would come out more vibrant and crisp with the Steam and more muter and blended with the Asperitas.
I used Dharma Acid Dye, using the colors Brilliant Yellow, Caribbean Blue and Dark Navy. I would take a little bit on my plastic spoon and sprinkle it in random areas.

SECOND TRIAL
For my second trial of snow-dyeing, I used 4 skeins of Knomad Yarns Egret which is 100% Organic Merino Wool.
This is a single ply yarn which results in more watercolor-like effects with dye.
I used Dharma Acid Dye, using the colors Brilliant Yellow, Deep Magenta and True Black. I sprinkled in horizontal lines across all skeins of the yarn. I knew the colors would blend together as the yarn was heated and set.